Wednesday, October 13, 2010

If you wondered what 800 pounds of dirt looked like...

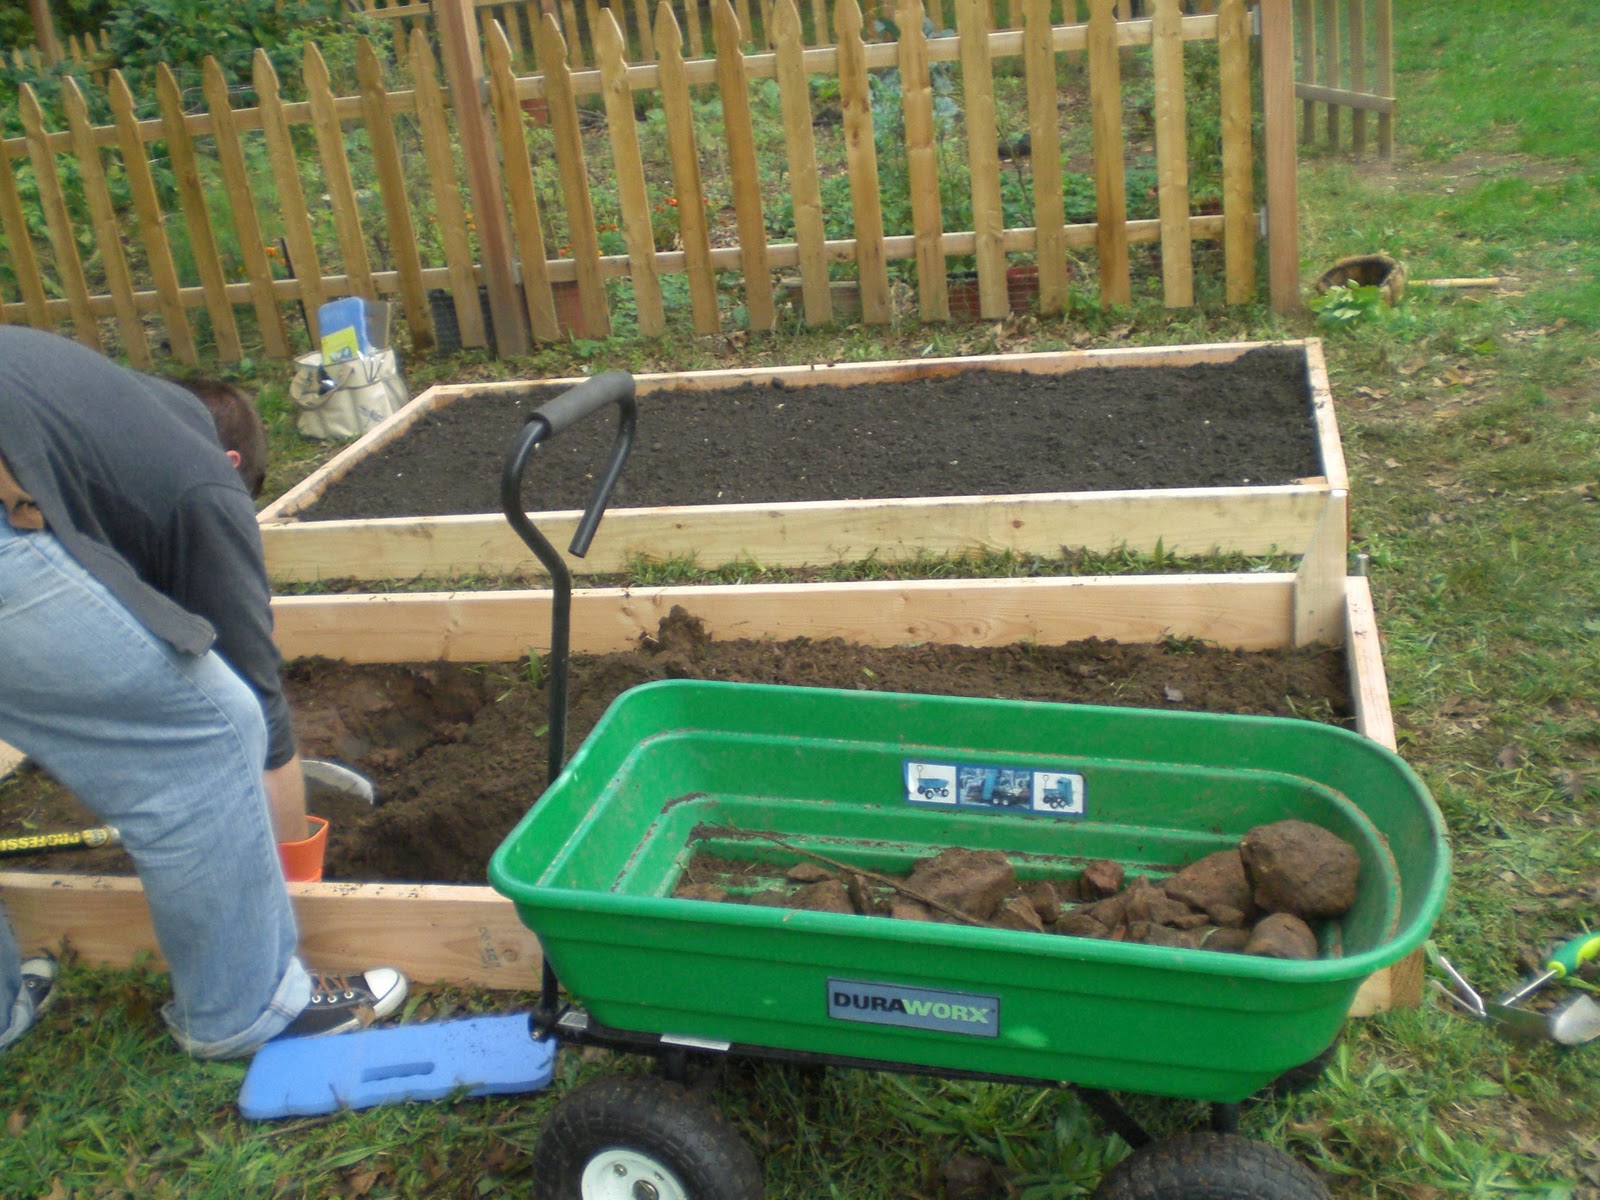
With one season of gardening under our belt, we decided that we needed to expand our garden. Seriously, do we need a lawn at all?  Raised beds here we come.   If you ever wondered what 800 pounds of soil and compost looked like, well here it is.  I don't think I've ever bought so much dirt, I mean "soil" in my life!  When we got a composter as a present, I was so naive to think that it would create more compost than I needed in the garden.  hahahahaha, silly amateur gardener!  I still get annoyed buying so much soil, but what choice do we have?
We also bought 6 pieces of 2x6 untreated Douglas Fir lumber measuring 8 feet long so we could make 2 raised beds that are 4x8 feet.  Once we loaded all the lumber and 800 pounds of soil / compost into our car it was so heavy that the tires were lower!  I love our Honda Element, so many things can fit in it!
The hubs built these with all the wood we bought and he decided to put spikes or anchors on each corner of the raised bed.  It's not necessary to add these but he wanted to make sure that the bed won't move anywhere.
We removed all the grass and dug up all the rocks in the dirt.  Our backyard has a lot of rocks and glass.  Apparently the previous owners used to bury glass in our yard!  How annoying!
We wheelbarrowed all the rocks and glass away.
Then added the bags and bags of compost and soil.  We did a mix of both in each raised bed.  We're using composted manure, going organic all the way again.
It took twelve 40 pound bags to fill the 4x8 ft raised bed. 
We also had some of our compost ready from our compost bin. One compost bin only produced 2 five gallon buckets of rich compost. I was hoping it would produce more, but I guess it's better than nothing.
Look how rich our compost looks compared to the one we bought at the store!
I raked everything together so it was well mixed.

Here are the two raised beds finished.  We plan on putting in two more additional raised beds, a project for another day.

Tuesday, October 12, 2010

Not Garden Related: Sharing a Recipe

This post has nothing to do with gardening and raising food to use in my recipes. I'm posting this because it was so much fun to do and thought I'd share it. Yesterday was my 2nd year wedding anniversary and to celebrate, the hubs and I made sushi!  I always thought sushi was too hard to make, but my sister taught me how to do this and it's really easy.  Just a bit of prep work.  We received this Sushi Book and Kit as a present some time ago and it's a great tool.  It comes with a book with recipes, a bamboo mat, a rice mold and 2 little bowls for soy sauce.  There are some key ingredients you'll need to make sushi, these can be purchased at an Asian Market or online.
1. Nori - Japanese dried seaweed
2. Sushi Rice - You have to use sushi rice because of the sticky quality it has
3. Rice Wine Vinegar
4. Wasabi
Click on image to see the book/kit on Amazon.
Sushi Deluxe Book & Kit
Other ingredients you'll need are sugar, cucumber, avocado, and some kind of protein like sashimi grade fish, eel, shrimp or crab meat.  Note: for raw fish, it's really important to use sashimi grade not only for the taste but the quality of the fish. For the Eel, I buy the pre-packaged, pre-seasoned japanese style eel.  It's pre-cooked, you just need to re-cook it in the oven for 10 minutes.  For shrimp, it must be cooked.  A trick I use is that I bamboo skewer peeled shrimp, and season with salt and pepper and cook in a skillet a few minutes on both side.  I skewer the shrimp to keep them straight when cooked.  If you didn't skewer it, it will curl when cooked.
To make the rice, measure out 2 cups of sushi rice and 2 1/2 cups of water. I cook this in a rice cooker because I am terrible at cooking rice over the stove. When the rice is cooked, scoop the rice into a bowl and add 1/2 cup of rice vinegar, 2 tablespoons of sugar, 1 teaspoon of salt and 1 teaspoon of soy sauce. Mix well. Put the rice in the mold to make these square rice shapes. Note: I keep a bowl of water on the counter to keep my hands wet while working with the rice, it's very sticky.
Cut the Nori seaweed into 1/4 inch strips, lay one strip down, then the rice.  Add a tiny bit of wasabi then a slice of sashimi grade tuna or whatever fish, eel, shrimp you are using.  Roll the seaweed strip around everything so it keeps it together.
This is what it should look like when it's assembled.
For rolls, you'll need to use a bamboo mat.  I like to put my mat in a large ziploc bag, this makes for easier cleanup.  Use a whole sheet of nori, and pat rice all over the nori in a thin layer.
Make sure you cover the entire nori sheet.
 
Then add whatever ingredients you want to put in the rolls.  Like for this one, I added eel and cucumber.   Then roll it up with the bamboo mat pressing it while you roll, roll away from you until it's a log.  Slice into 6 pieces with a clean knife.
To make spicy tuna, you'll need to make a spicy sauce and add cut up pieces of tuna. For the sauce, combine 2 tablespoons of mayonnaise with 1 tablespoon of sriracha hot sauce.  Mix the sauce with the chopped tuna until well incorporated then make the rolls like above with the spicy tuna.
Here is the platter of sushi when we were finished!
The only thing left to do is to sit down and enjoy the meal!  Delicious!

Christmas in October?

We were in Home Depot the other day to pick up supplies for the raised beds that we are making and we saw Christmas decorations already up.  It's really weird to see Christmas stuff up when it's not even Halloween yet.  Seriously, who buys Christmas decorations now?

Saturday, October 9, 2010

Potato Pancake Happiness!

I'm still trying out all the recipes I know that includes potatoes. I decided to make one of my husband's favorites, potato pancakes, (otherwise known as latkes)!
I use a food processor to shred the potatoes. It's fast and easy.  I used about 7 medium sized potatoes.
To the shredded potatoes, I add 1 chopped medium onion, 2 cloves of garlic minced, 2 tablespoons of flour, and 2 eggs.  These are eggs we got from the family farm.  Look at the color of the yolks!  The yolk is a brilliant yellow, unlike eggs you get at the supermarket.  These yolks are richer in nutrients because the farm hens are free-range chickens so they eat a lot of grubs and such, and they eat only organic feed. 
Aren't these eggs just beautiful?  Can you see the bantam egg in the bunch?
Check out the bantam egg on the right, it's so little compared to the regular size egg.  Cute.
Mix ingredients with 1 teaspoon of salt and 1/2 teaspoon of black pepper. Spoon the mix onto a heated oiled frying pan. Flatten the spoonfuls with your spoon to shape the pancakes, and cook until brown on both sides.
Doesn't this look just amazing?
I was so excited about the potato pancakes until the cleanup. I was washing the lid of the food processor, and it slipped out of my hands and fell into the sink. The force of the fall broke off pieces of the locking mechanism on the lid... Pooh! Now I can't close the lid to use the food processor. Sooooo annoying!  I tried looking online for a replacement part / lid, but this food processor is so old, they don't sell those pieces anymore.  Argh!
Check out other Garden to Table challenges on Greenish Thumb.
Related Posts with Thumbnails

Book Recommendations

ad