Wednesday, May 30, 2012

Ooooh Sweet Berry Goodness!

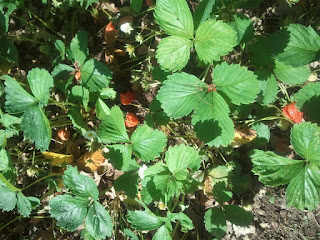
This is my favorite time of the year! Strawberry season! I've been going out to the berry patch everyday on the lookout for ripe red berries.
At long last, I have spotted some red berry goodness!  Oh yes please.  I try to be good and not eat them as I pick them.  Ok, I may have tasted one berry out in the patch!  
Day 1 of berry picking.  I picked 3 berries!
 Day 2 - 14 strawberries.
All over the garden, I also found half eaten strawberries.  Most likely, these were from squirrels as these were way on the other side of the garden.  I get so annoyed seeing red ripe berries that are half eaten like this.  Annoying!!
Day 3 - All the berries are now getting going turning red and sweet.  Half a pound of strawberries! I would have doubled this haul if it weren't for the bugs and slugs that I see on some of the berries.  So many berries perish because of the dang bugs.  This year I wanted to use diatomaceous earth, but I never got around to using it!
Washed and cleaned off, I cut off the tops and they go into a ziploc bag and into the freezer. I will collect all the berries for the freezer until I have enough to make strawberry jam / preserve!
Day 4 - The biggest haul yet!  One pound of strawberries!  Sa-weet!
All washed and ready to be processed for the freezer.  Ahh, it takes pure willpower to not pop all of these into my mouth.  The only thing that stops me from devouring all of these is how good the strawberry jam is.  Oooh, homemade jam!

Tuesday, May 29, 2012

Collecting Wild Beeswax

Our second bee inspection was super exciting!  It was our first chance of seeing the bees actively working on building beeswax and brood, (bee eggs).  Our second inspection happened after the second week of the bees being placed into the beehive.
Look at my head, that is a bunch of bees that have landed on the top of my head.  At the time, I did not know the bees were there, it wasn't until I looked at this photo that I realized my head was covered with bees.  And this my friend, is why we wear protective suits!  hahahaha.  When we open the top cover of the bee hives, the bees come out to investigate.  I guess they like the smell of my head, (mental note for next time), don't use hairspray.  Bees love fragrant scents so perfume and hairspray are attractors to them.  It's not wise to use fragrant products while you inspect the bees.  I shall remember that for the next time.
Once the bees come out to investigate, some try to get back in.  Here they are, crowding the entrance.
There are only frames on the bottom deep.  The top one is empty until the bees fill 7 frames full of wax and brood, then we can start adding more frames.
Here is a photo of one of the frames!  Boy have they been busy in 2 week's time!  This is a frame of capped brood.  The queen lays an egg in each of the holes of beeswax honeycomb foundation that the worker bees create. Each blank hole in this photo are baby bees that were born.  Cool right?
Here I am scraping extra honeycomb that the bees have been putting on the sides of the frames.  This happens when there is too much space between the frames.
A view from above the beehive. As we moved the frames apart, we can see that the bees have built wild honeycomb between the frames.
It's important to remove the extra honeycomb, so that bees build across the frames.
We really left too much space between the frames.  Look at this frame, how much wild burr honeycomb they built on the side of the frame!  The one on the right is giant!
Here is a closer look.
And another angle.
I took a bee brush and wiped away the bees.  Then carefully remove the extra comb without disturbing the beeswax underneath it.  Check this out!  How amazing is this??
And a closer look!  We save the beeswax in jars that we will melt down and use for candles and to make lip balm!
Another frame with more wild burr comb.
Here is Paul, proudly holding up one of the frames, with all the bees working diligently.  We were so giddy to see this!  Overall, the second bee inspection went really well.  The bees are happy building out their new home, and the Queen is busy laying eggs.  We are having so much fun!!  This is the best new hobby ever!!

Thursday, May 24, 2012

I'm growing Shitakes!

In my last post, I posted a photo just like this one below and I asked the blogosphere if they knew what I was up to.  All you gardeners are so smart and were right on target.  Yes folks, I took a class at The Hort and learned how to inoculate logs of wood with Shitake mushroom spores. 
If you live in the New York City area and love to garden, I highly recommend getting a yearly membership at the Horticultural Society of New York.  Seriously.  Do it now.  I bought my membership this year, and to date, I've taken already 4 gardening related classes and each one has been amazing!  A wealth of knowledge from experts in the field.  This class was taught by Ari Rockland-Miller who writes about all things mushrooms on this site, The Mushroom Forager.  The first part of the class was a powerpoint presentation where Ari described the different types of mushrooms and how to forage for them.  What to look for, when to look for them, what they taste like, and how to store them.  He gave us tips about what to look for when identifying mushrooms and which ones you should stay away from because they can be deadly.  Mushroom foraging is difficult for the newbie, there are many varieties of mushrooms that look like an edible type, therefore you have to be careful with identifying funghi since there are many toxic ones.  Ari went over a few of the easy identifiable ones like the Morel, Porcini and Chicken of the Woods.  If you find a Morel or Porcini he says, then you've hit the jackpot. 
After the lecture, it was our turn to learn hands-on how to inoculate logs with Shitake mushroom spores.
Not all mushrooms varieties can grow from decaying logs.  Shitakes happen to be one of the easier ones to grow.  Being of Asian descent, I've eaten lots of Shitakes in my lifetime, most of the time, they have been dehydrated Shitakes from Japan, Taiwan or China. So to be able to grow them fresh is absolutely, "the coolest thing ever"!
Look at all these people taking the class!!  One of my questions to him was... Where do you put the log if you live in a 600 square foot apartment with no access to a backyard?  His answer?  The fire escape!  Sweet!
Here we all are taking down notes. Definitely a lot of interested funghi people in this class.  The best type of logs to use for inoculation are oak, beech or sugar maple.
The first step to inoculation is drilling holes into the log.  He used a drill bit that was about 3/8 of an inch wide.  He made 4 holes across the log and turned the log 4 times to make a total of 16 holes.
Then the fun part.  There is this plunger type of inoculation tool that you use to insert the mushroom spores into the log.  You insert the tool into the big block of Shitake spores, the mycelium and then put it over a hole in the log and press the button on top of the tool and this pushes the spores into the hole.
This was so much fun!  Each one of us in class got to chose our own log and inoculate it.
After you inoculate each hole, then you take a cotton swab and cover the hole with some melted food grade wax or beeswax.  The wax keeps the spores in the hole and as the log starts to decay the spores take over the log.
And here is my inoculated log.  It was kinda funny carrying this log on the city bus home with me. I definitely got some interesting stares.  I have to find a good place outdoors to leave the log. Ari said that to get the log started, that the entire log should be immersed in water for 24hours to shock the log.  Then place outdoors in a damp semi-shaded area.  Mushrooms need moisture to grow, so it's good to mist the log and sometimes cover it with some plastic to increase humidity.  Then every 2 months, reshock the log but immersing in to water again.  In about 6 months, we should see some signs of growing mushrooms! If you want to try your hand at growing mushrooms, Ari recommended this website. They sell spores and all types of supplies! http://www.fieldforest.net

Tuesday, May 22, 2012

Guess what these are??

I went to the coolest class a few weeks back.  Guess what these are?

Saturday, May 19, 2012

First Bee Inspection

Ok, this happened over a month ago, but I am sooo behind on blog posting. We had our first bee inspection, where we opened the hive to check on the progress of our honeybees.  I snapped a photo of the worker bees flying back to the hive, they are carrying pollen between their legs.  It's fun to watch them fly back, it's like a winged highway, all flying in line on their way into the hive.
This is the top of the first deep when we opened the hive cover.  The honeybees are all over the tops and inside of the frames.
I beekeep with 3 other people.  We met in beekeeping class and decided to partner up in keeping 2 beehives.  As a newbie beekeeper, it's great to be able to take on this adventure with other people.  It makes the experience a little less intimidating. This is May and Victoria, two of the beekeepers in our group.
This was our first time checking on the frames.  The honeybees are doing amazing!  They completely covered the frame with activity.
Isn't this incredible?  We were all so giddy with happiness.
We noticed that we saw on some of the frames that the bees were building extra honeycomb on top of the frames.  This indicates that there is too much space between the frames.
A closer look of the frame that has the extra honeycomb.  Our instinct was to knock off the extra honeycomb, but we weren't sure.... We decided to wait and ask our bee teacher what to do.
A side profile of the bee bump or extra honeycomb.  They literally have started building a second layer of honeycomb.  What we learned from class is that this is not really wanted in the beehive, we will inquire with our teacher on how to remove it.
We maintain two beehives.  One is a backyard, and the other on top of a rooftop.  Our bee teacher recommended to us to have two beehives, as novices, it helps us to know if the hives are doing well, because we can compare the activity of the two.
photo credit: DK Holland
I'm the one in the middle in this photo.  Our bee host takes photos of us beekeeping which is great!
photo credit: DK Holland
We use a bee brush to gently move the bees off the frames so that we can check them.
photo credit: DK Holland
Here we are carefully removing the wax off the top of the frames.
photo credit: DK Holland
I'm taking photos of us here with my phone.
photo credit: DK Holland
The beehive on the rooftop is also doing well.  There are no extra honeycomb bumbs, which is a good sign.  That means we did the spacing between the frames better in this hive. We saw lots of brood, pollen and honey.  All good signs!  Doesn't May look so happy holding up the frame?  We totally love beekeeping, it's so much fun!
Related Posts with Thumbnails

Book Recommendations

ad